Saturday 30 April 2016

Procrastination is the enemy

The Last Day Of Break: 

We've just had a 2week break from School! YAY
Did I leave all of my work to the last few days? YES 


Wednesday 13 April 2016

Grid with my own photo

For my own grid I used some pictures of my shoes. I used an action over a batch of photos to apply the same affect. I used the black and white filter and adjusted the curves of the image to give it a higher contrast.

Sunday 10 April 2016

Grid Composition practice with Dulcie's photos


So today in class we learned about grid composition in Photoshop and how to create contact sheets in Adobe Bridge.  My hard drive had corrupted and I had a terrible time with the computers while trying to accomplish this

The image below is my grid composition of 9 of Dulcie's photos before I batch processed them.
    
The following Images are what were on my contact sheet before the batch process.  


In Photoshop you can record what edits you make onto an image and apply that recording known as an 'action' to a batch of photos to make the same difference to each picture.
 I used a black and white filter, adjusted the curves of the image to give it a higher contrast and then added a warming filter which was then applied to all images.  


Wednesday 6 April 2016

Adjustment Layers

 So today we were playing around  with adjustment layers, I chose this photo of a hillside and road,  

 
The first things I adjusted on the image were the curves and the colour balance, then I added a colour filter with a warmer sepia tone. 
 
I started playing around with other filters and I practiced using the gaussian blur as I can see myself using this filter in the future. I then added a pixelation filter which was the crystalise pixelation which gave the landscape an almost watercolor effect that I used a mask with to keep the road sharp 
 

we then played around with this lovely picture, the original has been straightened for this blog, firstly I made some adjustments to brighten up the foreground then I added in some colour masks to yellow up the hillside to mimic sunlight, I then added a more purple filter to mask over the mountains, and finally I added abit more blue back into the sky.  


the image below was made to show that I am capable of using a variety of filters and embellishments.


The adjustments above are what i used on my image, which I used alongside masks to paint the effects in.  


~Digital Diaries Developing~


Tuesday 5 April 2016

Cutout the kitchen!

 
So for our homework we were given the task of photographing items we would find in our kitchen and clear cut them- to save you the time of scrolling through before and afters I have just posted the finished photos. 


Monday 4 April 2016

I LOST MY WORK! OH NOES

So my hard drive decided to not work at all ever for the rest of eternity, 
which left me to redo all of my work from the beginning of this class. 
yay. 
Basically I just told myself to get cracking so here's my work from a few weeks ago that I managed to do today!!  
firstly we began with a simple oven door,  which we had to cut out by making a selection then adding our selection to a new transparent layer, afterwhich we will fill that layer with a colour. 
 

 I used the rectangular marquee tool and that was the most efficient way to give me my end result. 
  

I then experimented with the elliptical marquee tool as well as the rectangular marquee tool to make a selection around a bunch of lollipops. It takes a little bit of practice to get your head around the right placements for this circular tool but I got there!

 
after selecting each of the bits of candy I copied the sticks over, then added a color fill layer. This was my end result. 


The colour range tool is what we used for these vibrant spoons, I chose the pink one! 
the colour range tool introduced me to the refine edge tools which will improve my editing skills alot! I took my time with this image and played around a little with maskin just to keep practicing the skills I am developing 


Isn't this great? 
I made a selection of this grater using the lasso tool, once i formed my selection I copied it onto a transparent layer then added a pure white fill layer. 


The magic wand tool is a tool I am becoming to find more helpful ( now that I know how to use it to its full potential!) we were given an image of a spoon which had already been clear cut, and our jobs were to clear cut it again!!!


The pen tool. 
The pen tool and I are going to be great friends one day. 
Today wasn't that day. 
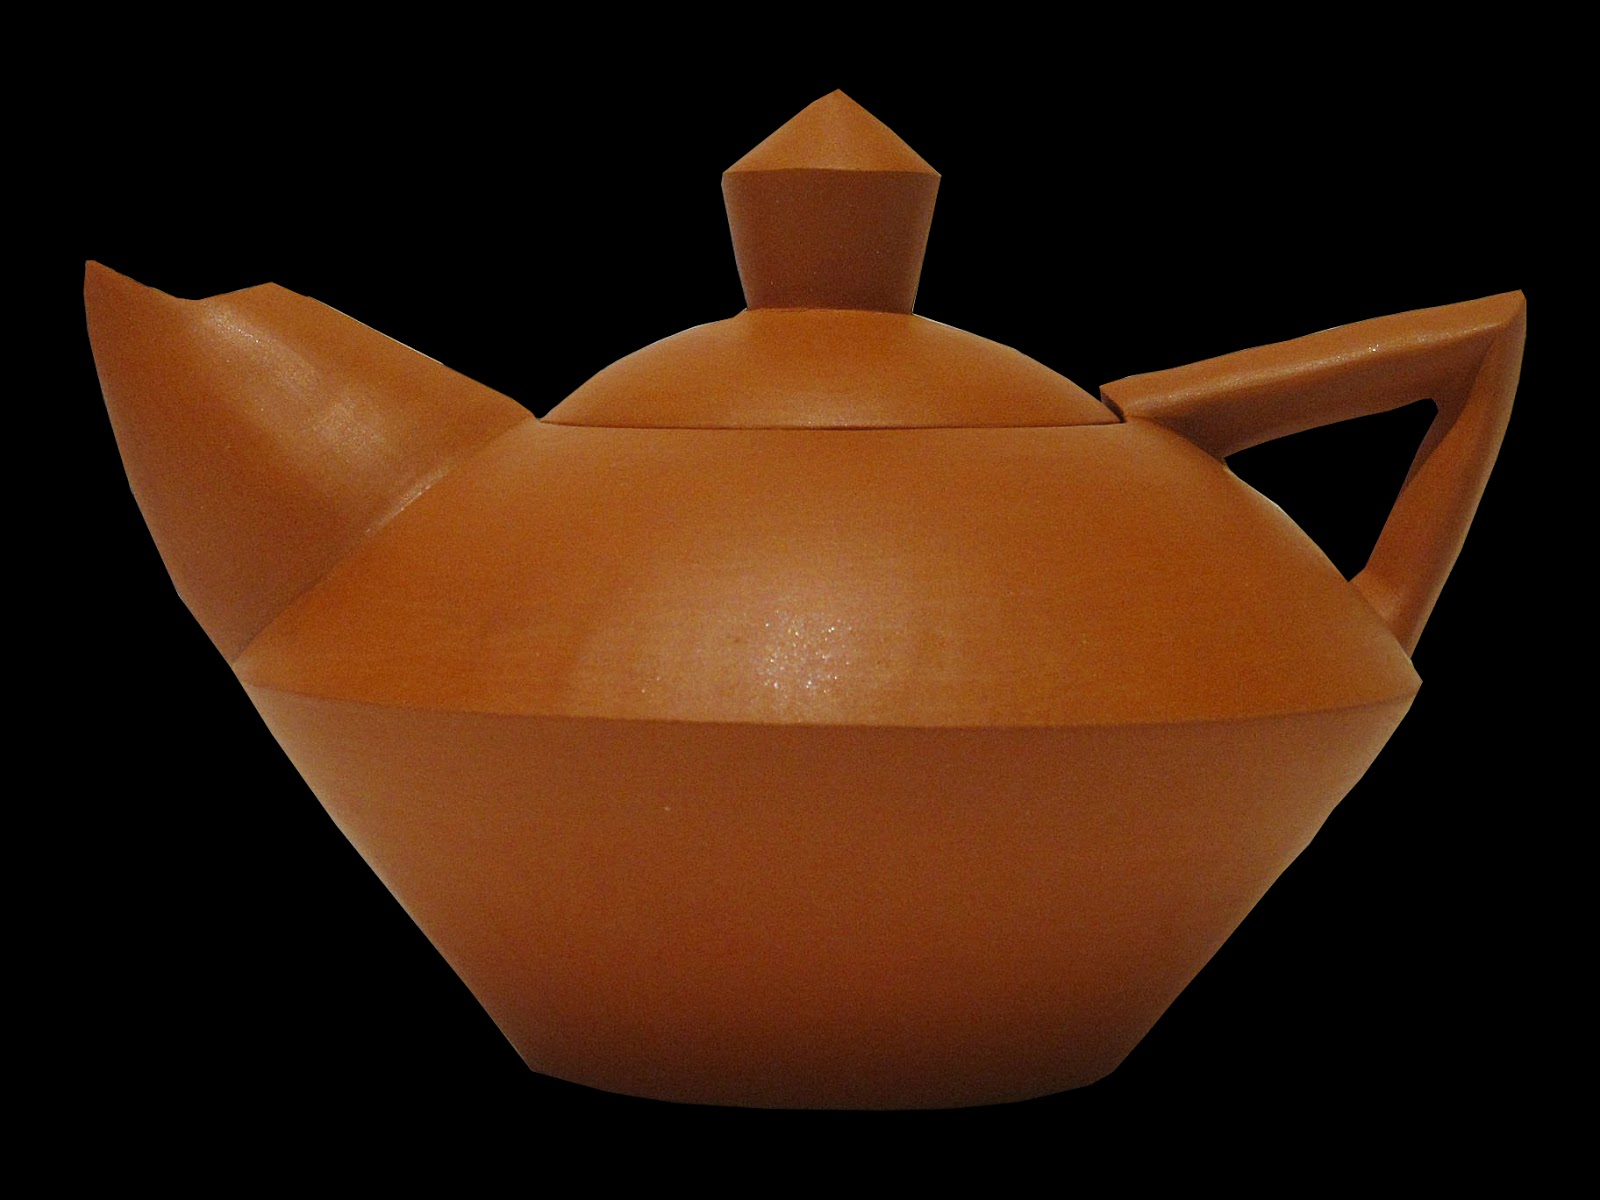
I am going to need to watch a couple hundred youtube tutorials before I understand how to work the curves properly but I will get there! as per all the other tools- I made a selection and copied it and put it onto a background. 


Dance dance, 
I used multiple tools to create this image,  
magic wand selections
quick selections
masking 
copying
and adding to a new backround

Wednesday 30 March 2016

retouching again!


Once again I'm back at it practicing my retouching skills, while I only used one subject this time I found a more difficult image to do. A younger cousin of mine decided it would be a good idea to color in and add some buttons which I had the pleasure of removing.   

The first step I took in producing this image was to crop.  

I then used the patch tool to correct the fold marks and the black print smudges AND the white print in the lower left corner.   

Once i was happy with the cleanliness of the image I altered the levels, highlights, shadows and contrast.  

Finally I added and un-sharpening mask to sharpen the overall image to make it more crisp. 
 This was the end result. 


~Digital Diaries Developing~